This post will answer three big fat questions… pun intended.
1. Why in the hell would anyone want to render fat?
2. Where in the hell do I find fat to render?
3. How the hell do I render fat?
I’ll answer questions 1 and 2 later in this post. For now, I’m going to assume you know the “Why?” and “Where?” and came here to learn how I render animal fats.
How in the Hell Do I Render Animal Fats?
Included in this post are two methods I use to render fat. One is super simple and so easy a ‘caveman can do it”. The 2nd method is the generally accepted ‘proper’ way, it’s simple too… but requires the cooking down of trimmed fat.
Super Simple Way of Rendering Fats
Step 1: Cook fatty meats in a pot, broiling pan, skillet … any container that can hold the fat that’s been cooked out of the meat. I’ve even rendered schmaltz (chicken fat) by pouring off the leftover fat after broiling chicken thighs using a broiler pan.
I love grilling meats over fire, the only negative with grilling is losing all of the fat that drips off of the meat. One solution could be possibly using ‘indirect heat’ with a drip pan under the meat, but I haven’t tried this method.
Step 2: Pour off the leftover fat into a cup, bowl or jar to cool and settle. The fat will ‘settle’ on top while the broth and juices will settle at the bottom.
Note: If you want to do this ‘by the book’, you can pour the liquids through a strainer or cheesecloth, into a bowl or cup. This is done to remove ‘the bits’ that may remain in the liquid. When using this ‘super simple’ method I never strain. Why, because I use all the fats in a few days, I don’t have to worry about spoilage.
Step 3: Place the container with the fat into the refrigerator, with a lid if you choose, I usually do not.
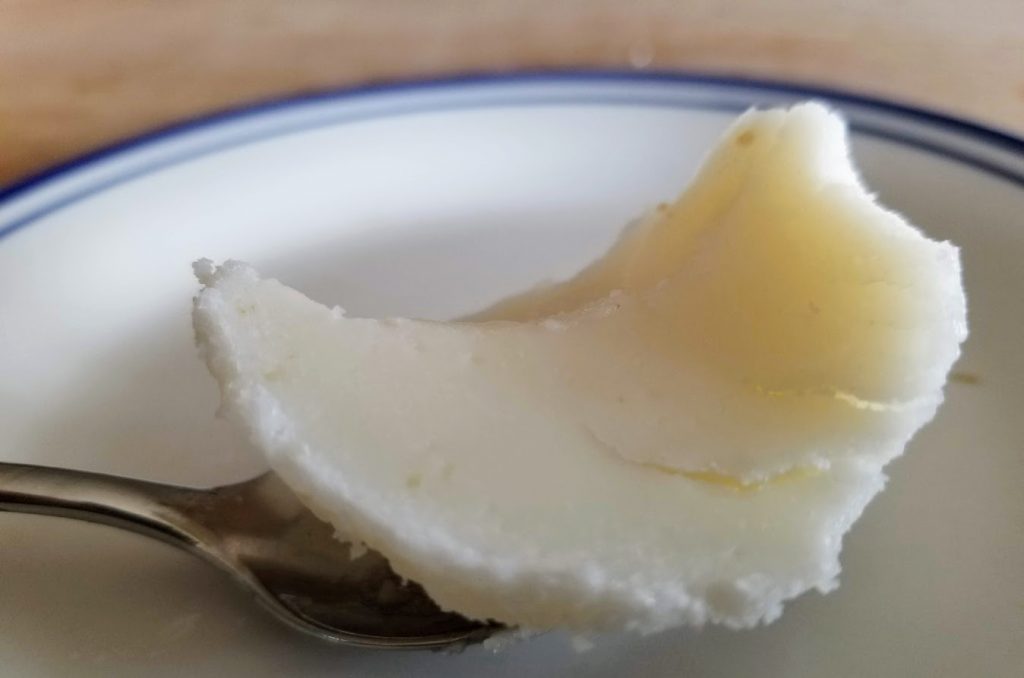
Once the mixture cools and hardens, you can spoon off the fat that has hardened on top. The congealed broth (below the fat) can be added to foods when cooking to add flavor and nutrients to the dish.
That’s it! Congrats! You have now rendered fat!
See, I told YOU!!! … so simple a caveman can do it.
Note 1: I love this method for it’s simplicity. Too, I can easily use the fat over the next several days… I do not need to worry about straining the leftover bits and spoilage.
Note 2: If you don’t think you will use up the fat in few days, then by all means strain the leftover mixture before allowing it to settle and harden. Using the proper method will allow you to store your rendered fats for weeks and even months by removing ‘bits’ that can spoil.
Proper Fat Rendering
The first method we covered is used when cooking fatty meats. The main difference with this ‘proper’ method is… we are going to use fat that we have trimmed off of meat, prior to cooking.
Step 1: Obtain two or three pounds of uncooked fats.
If you aren’t sure where to find these I discuss this in more detail in a later section
Step 2: Cook the fat!
A crock pot makes the process super simple … but any container that can hold the fat that’s been cooked out of the meat will do.
Using a crock pot, we add a cup of water, set the temperature to low, and let the fat cook overnight. We typically cook the fat down for about 24 hours. We check it periodically just to make sure there’s ample moisture and that the fat isn’t burning.
Step 3: Pour the liquid fat through a strainer or cheese cloth
This step is done to remove any non-fat ‘bits’. Pure fat can be stored for weeks or even months, but the non-fat ‘bits’ can cause spoilage if you plan on keeping the fat for longer time periods.
Step 4: Place the fat into a container with a lid.
To store the rendered fat, bowls, drinking glasses, cups and Mason jars… all work just fine. If the container doesn’t have a lid, we place a saucer on top of the container… it works just fine for us.
If you are rendering large amounts of fat, you can certainly freeze the fats for longer term storage. We use fats almost every day… so longer term storage of rendered fats is not an issue.
That’s it! The ‘proper’ method is very simple as well… the crock pot does most of the work.
Both methods are super simple…
The Big Fat Questions (cont’d)
Ok, I’ve already answered the question, “How in the hell do I render fats?” I’ll now answer the remaining big fat questions…
Why in the hell would anyone want to render fat?
1. Cost Savings – I love butter, avocado and coconut oil, I consider them healthy to consume. However, why even buy healthy fats when with a little effort you can use fats typically thrown away?
Save the money you would normally spend on healthy fats (or unhealthy fats) and reallocate the money for meat!!
2. Health Benefits – Stop buying ultra processed, unhealthy products. The unhealthy fats are often referred to as “industrial seed oils” and include corn, canola, rapeseed, sunflower, safflower, vegetable, etc … all are unhealthy and I have avoided them since 2009.
Note: If you still believe that industrialized seed oils are healthy, I urge you to check out Tucker Goodrich’s blog post, “What’s Worse—Carbs or Seed Oils?“.
Additional links:
“The Cause of Metabolic Syndrome: Excess Omega-6 Fats (Linoleic Acid) in Your Mitochondria“
“How To Prevent Oxidative Damage In Your Mitochondria“
“What Effect Does Linoleic Acid Have On Mitochondria?“.
3. Food Integrity – I do not trust large corporations. If I grow, produce or create my own foods, I know and can control the ingredients and the food production process.
4. Food Independence – The more I ‘own’ the food production process… the less reliant I am on large multi-national conglomerates (Big Food) … and that’s always a good thing.
People all over the world use fats to cook and prepare food. Too many humans today buy their fats needlessly and too many people are buying unhealthy ‘manufactured’ oils from large food conglomerates…. things like Crisco, margarine, corn oil, vegetable oil, canola oil, etc —- I avoid all of these products.
The only fat’s I’ve purchased in the last dozen years are real, full fat butter, extra virgin olive oil and unrefined coconut oil. I do this, not ‘just’ for the cost savings, but for all of the reasons above, especially food independence. The less revenue I provide large corporations, the better. I prefer not to add to their bank accounts, especially if I don’t have to do so.
Where To Find Fat
- Butcher Shops
Stand alone butcher shops or the butcher shops in grocery stores are an excellent source for obtaining animal fats. Call or visit a butcher shop and ask for *FREE* animal fats. This is more apt to work if you are a regular customer but some shops may still give out free animal fats… or at least sell the fat for a nominal fee. I’d definitely pay $1 a pound for quality animal fats, if I was running low (which I never do). :)
The lesson here is to make sure to introduce yourself to your butcher, I do. My favorite butcher is Colin, a friendly, knowledgeable guy from Ireland living in the Canadian interior.
- Cook Fatty Meats
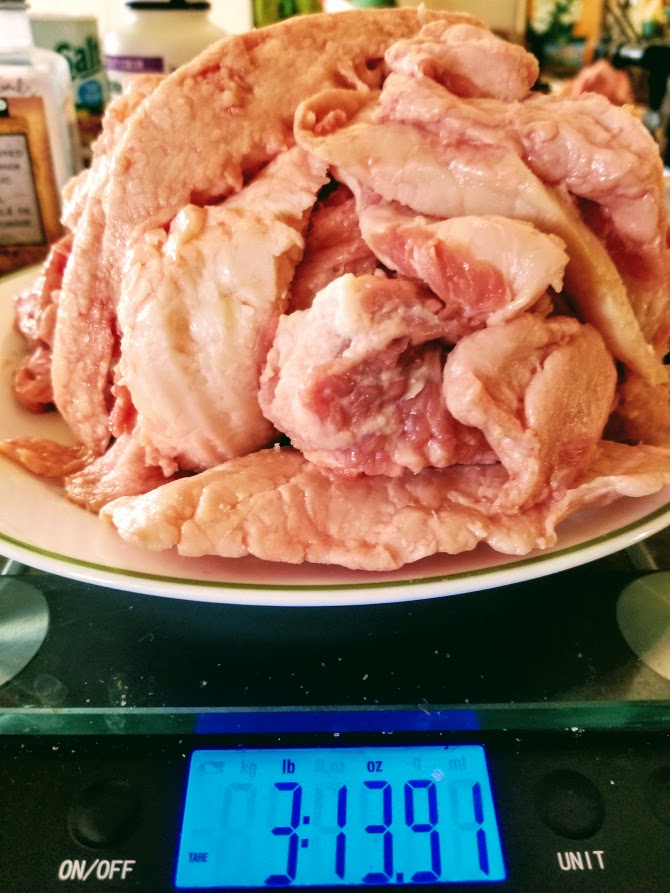
I usually cook a LOT of fatty meats, so I have no shortage of opportunities to render animal fats. When I am in ‘fat burning mode’, I will eat more leanER cuts of meat, but even then I still eat enough fatty meats to keep a good supply of rendered fats available. - Buying Meat In Bulk
This is even more of a cost benefit due to the increase of meat prices thanks to the COVID19 restrictions. Below is a recent haul from Costco, a whole beef brisket, whole pork loin, whole sirloin tip and whole round.
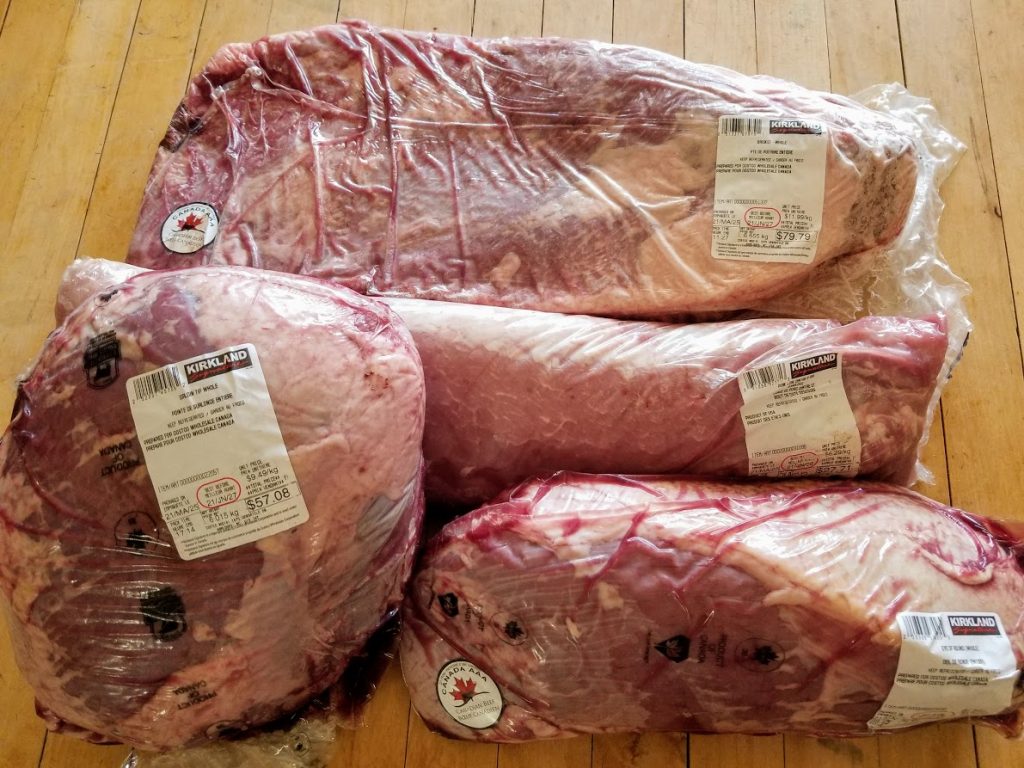
To save money, we buy meat ‘in bulk’, buying ‘whole’ roasts that weigh from 10 to 25 pounds on average. While cutting up into smaller roasts or steaks, I trim the fat off of the fattier cuts, in this case it was the whole sirloin tip and the whole brisket.
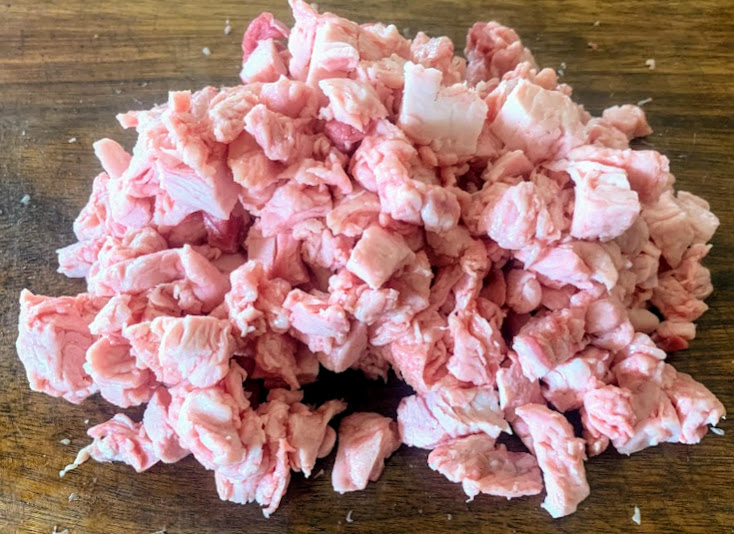
The picture below is fat trimmed off the whole brisket and the whole sirloin tip roast.
NOTE: We bagged the fat and placed in the freezer. We have plenty of rendered fat for now and will save this for leaner times (pun intended). :)
An Additional Benefit – Cracklings!
In addition to all of the benefits mentioned previously, there is yet one more benefit to rendering your own fats… Cracklings!
Cracklins, like those in the picture below, rival bacon bits in flavor… believe it or not.

Here is a post I recently wrote on making your own cracklings. I won’t go into all the details, except to say… once you cook down the trimmed fat, all you have to do to make cracklings is brown the remainder in a skillet! To add even more crunchiness – crisp them up in the oven or toaster oven.
Rendering Fats ‘Cuz COVID19
I have used the “super simple” method of rendering fats since 2009. It worked perfectly for me… I didn’t have a reason to try anything different.
That all changed with the restrictions associated with COVID19, which resulted in skyrocketing costs for everything … including meat.
With the higher costs of meat, we decided to save money by buying meat ‘in bulk’ …at a discount. While we are cutting the bulk meat into steaks and roasts, it’s very convenient to trim some of the fat for rendering later. After you have completed the trimming, toss the fat into a plastic bag, place in the freezer until you have 2-3 lbs for rendering.
I really can’t stress this enough … if your finances are tight, and the price of meat is a concern… YOU SHOULD BE BUYING MEAT IN BULK. Costco always has meat in bulk but all of the grocery stores we frequent also sell the bulk packages of meat.
…all you have to do is ring the bell and ask for a price list.
Buying meat in bulk will allow you to save money on meat but will also allow you the opportunity to trim some of the fat and make your own ‘rendered fats’ for cooking!!
Cutting up a bulk package of meat can be a little daunting at first (it was for me) but once you do it once or twice… it’s a piece of cake!! 😂😎 But seriously tho, give it a try! Youtube has many “How to” videos for various cuts of meat.
Recap… Why should you buy meat in bulk and render your own fat?
- Save money.
- Improve your health.
- Improve your food integrity.
- Increase your food independence!
No excuses!!! … do it!